1987 928S4 Power Window Refresh Procedure
My driver’s side power window was painfully slow, especially on the way up. I purchased a new power window motor from 928 International, and had some time after being away from the car for 7 months.
I believe most (if not all) of the power window mechanism in the 928 production run from 1978-1995 are more or less the same. The window motors changed the number of teeth that they employed: the older motors (1978-83) used eight teeth, the newer ten. Mine was a 10-tooth-motor.
First, I removed the door panel. There is a procedure to follow, with photos, on landsharkoz’s 928 page, here:
http://www.landsharkoz.com/forms/928_door_panel_removal.pdf
A couple of mistakes I’ve made in the past:
– It is easy to lose parts (especially the small screw that holds the backing for the door release lever) so keep them in a safe place.
– Near the door lock, there is a one-inch protruding piece of thin metal that slides in near the door lock. One must slide the interior panel forwards towards the front of the car, otherwise trim will be ripped. I found this out the hard way the first time I tried to take apart a door panel.
– Special care needs to be taken to ensure that the speaker wires and mirror wires are not ripped off at their respective crimps.
NEW PARTS
Left Window Motor, 928 624 014 03. I purchased a used motor from 928 International.
SHOP SUPPLIES
DeoxIT Brakleen Brush Shop Rags White Lithium Grease Torque Wrench (to torque bolts to 84 inch-pounds.) Allen Wrench
To remove the window transmission, I did this:
1) Window up.
2) Put a screwdriver under the window to catch it so that it won’t fall down. I originally used a C-clamp, but it got in the way when I tried to remove the window regulator.
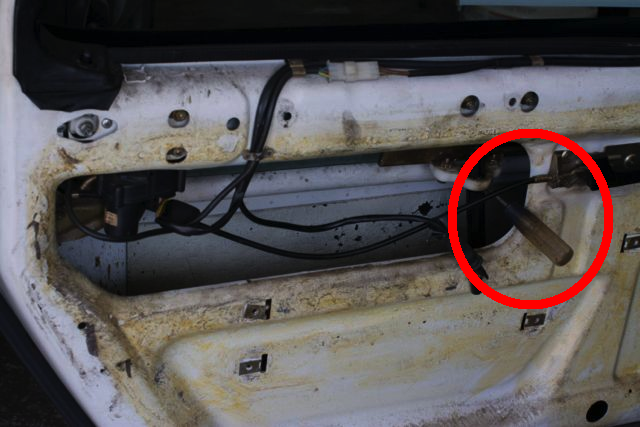
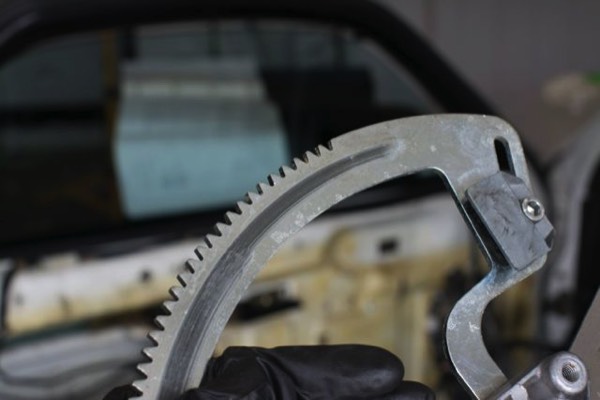
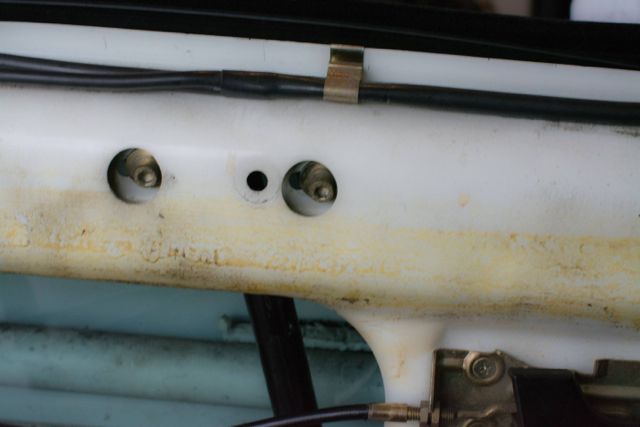
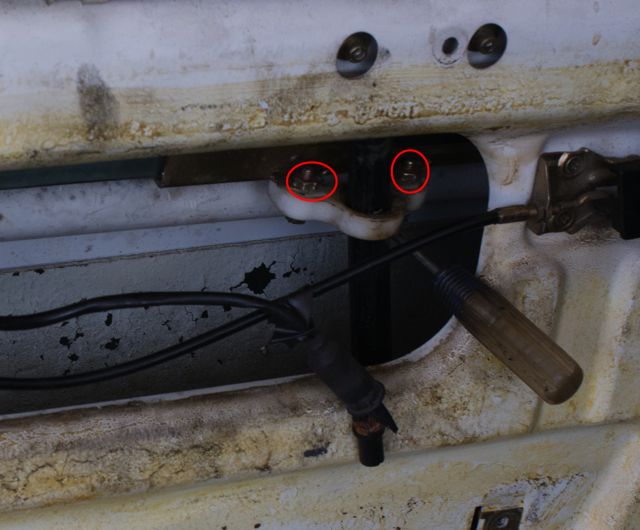
3) Removed four 10mm bolts (circled in red). These four bolts hold the window transmission (which at this point is bolted to the window motor.)
4) Wiggled the window transmission, which freed the regulator from the window rail. The regulator has a plastic wheel at the end of it. This wheel fits inside the window rail- it looks similar to the mechanisms of some closet doors.
4a) Roger Tyson- from 928sRUs- suggested that I had an electrical problem. I crawled under the glove box and cleaned ground point V (above the CE panel) with some DeoxIT and immediately got a .25V improvement at the window motor.
5) While holding the motor (otherwise your fingers will be pinched), lowered power window to bring the window transmission to the down position. (Obviously, the window isn’t going anywhere, since it was disconnected from the window transmission at this point.)
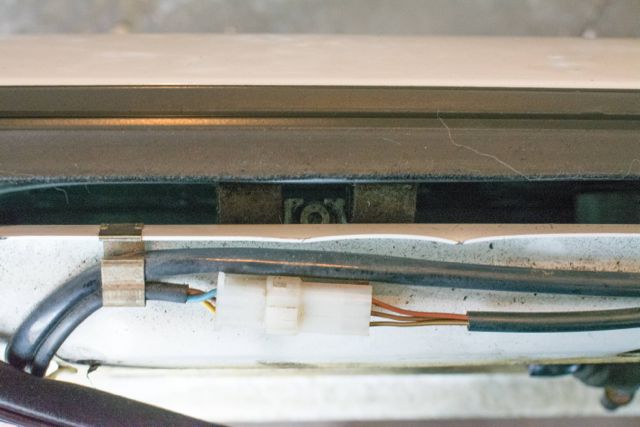
6) Removed the power supply to the power window motor. It pulls off, very simple.
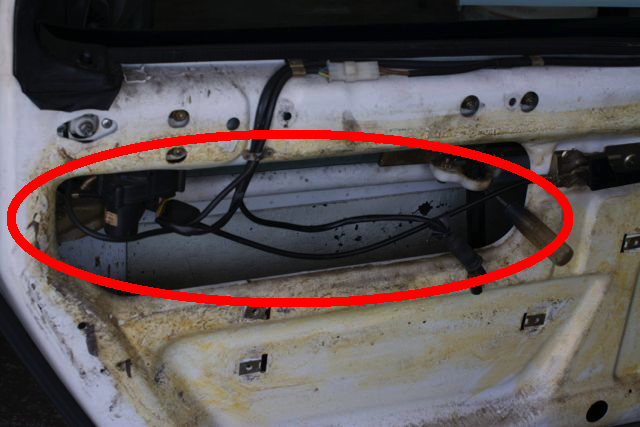
7) Gingerly pulled the window transmission through the big hole in the door (circled in red.) (While removing the window transmission, I had to remove the screwdriver and hold up the window with my right hand.)
8) Now that the window transmission was on my garage floor, I reconnected it to the power supply and moved it to the up position. The reason for this is there is a spring (reminiscent of a watch spring) in the window transmission- which looks like it assists in lifting the window.
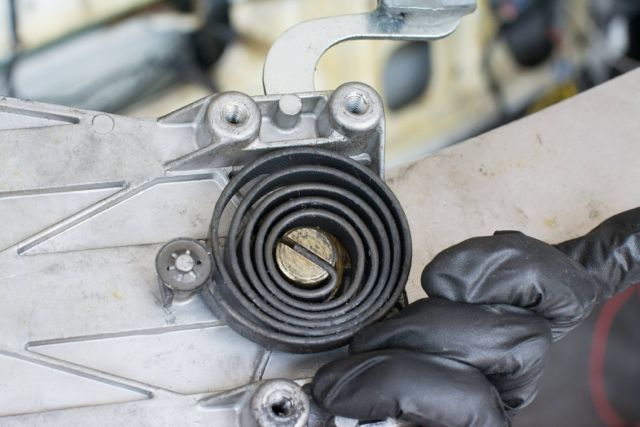
That spring needed to be ‘unsprung’ when removing the window motor.
This is what the window transmission looks like.

9) The window transmission looked dirty.

I cleaned the teeth on the window transmission with Brakleen and a brush, then coated it lightly with white lithium grease. I also cleaned and lubricated the white plastic wheel at the end of the window transmission arm.
I also cleaned the inside of the rail (it is attached to the window, looks like it is yellow cadmium-plated, and has a cross section of a square C) with a brush and coated it with white lithium grease as well.
10) The window motor is connected to the window transmission via three 10mm bolts. I removed those. I tested the existing motor against a used motor I recently purchased from 928International. I went with the 928Int’l motor- it seemed to spin faster. (I will disassemble the existing motor and have it as a spare.)
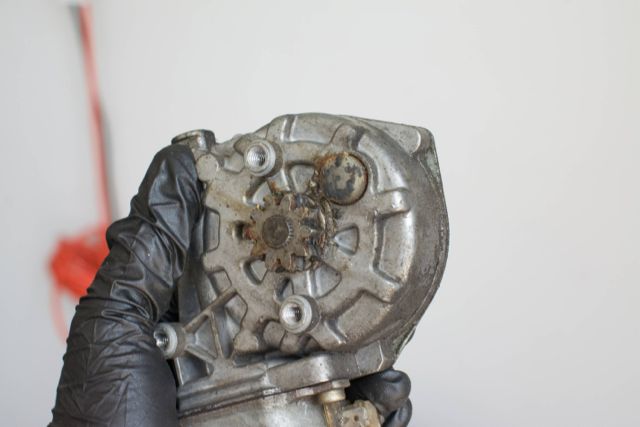
11) I attached the replacement motor to the window transmission, torqued the three 10mm bolts to 84 in-lbs, then attached it to the power supply, and brought it back to the down position.
12) a) I slipped the motor/transmission back into the big hole b) Reconnected its power supply c) Raised the window (which as before, didn’t move the window but moved the transmission’s arm into the correct orientation) d) slipped the white plastic wheel into the window rail, e) Bolted the window transmission back into the door, torquing each bolt to 84 in-lbs.
13) I gently loosened two allen bolts that hold the felt at the top of the door (one of which is pictured below)
and two allen bolts that hold the window’s guide bar
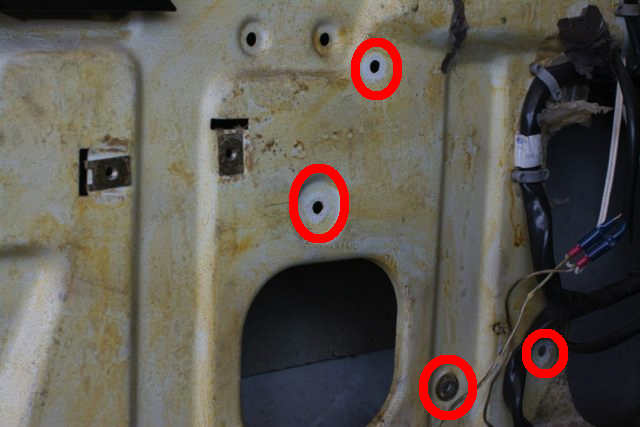
and four bolts that hold the white plastic guides (two of which are circled in red below)
14) I proceeded to raise and lower the window several times. The window seemed to travel faster each time. After a few repetitions, I retightened everything I loosened before.
15) I reassembled the door panel, and took my wife out to dinner. The window goes up and down very fast!