Zinc Electroplating Tips using Caswell Copy Cad
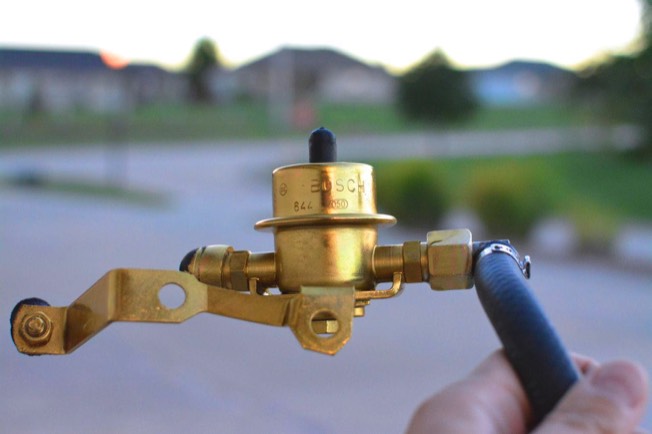
While doing the intake refresh on the ‘86.5 928S I wanted to restore some of the clamps, tubes, and other metal parts to their original yellow cadmium finish. Unfortunately, cadmium plating is basically illegal these days because of environmental concerns.
I ended up choosing Caswell Copy Cad kit. It simulates cadmium plating of metals.
SHOP SUPPLIES
This is a list of what I used to plate.
From Caswell
Caswell Copy Cad Plating Kit, which will include plating solution and a zinc plate (which sacrifices itself to plate your things.) I bought an extra zinc plate as well.
Yellow Chromate (to simulate the Cadmium color)
Heating unit.
Extra “brightening solution.” It goes quickly.
A thermostat for the heating unit, and a heavy-duty glass thermometer.
An aerator pump for the plating solution.
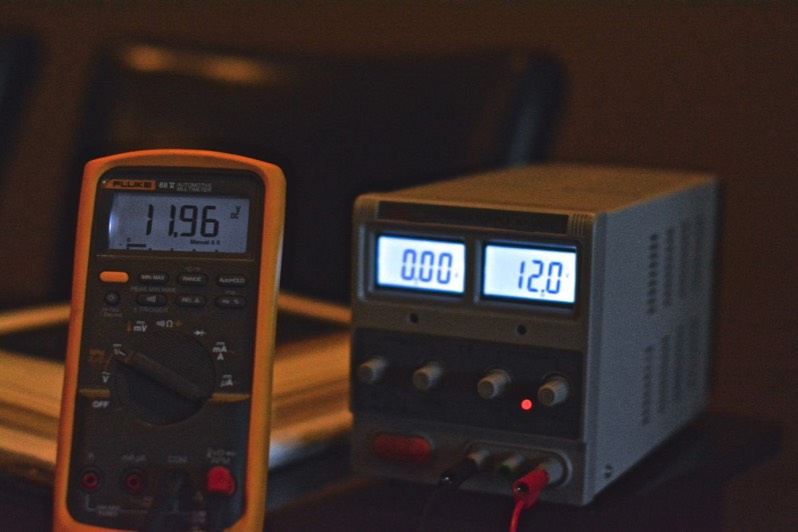
A constant current rectifier. Mine is a 5 ampere maximum unit. That means that I can plate 5/.14 = 35 square inches maximum at a time. Caswell sells them, but I bought mine online.
You will also need
A multimeter
4 two-gallon buckets, one each for plating solution, hydrochloric acid (diluted to 5%), distilled water, and yellow chromate solution.
A copper pipe, which you will cut and bend the ends to fit over one of the buckets.
Copper wire
Hydrochloric Acid
Two alligator clips of different colors (Anode and cathode are very important!)
Very thick rubber gloves
Respirator
Protective goggles.
Something to strip the parts down to bare metal before plating, whether that be a wire wheel, bead blasting cabinet, or both.
This is the rectifier setup.
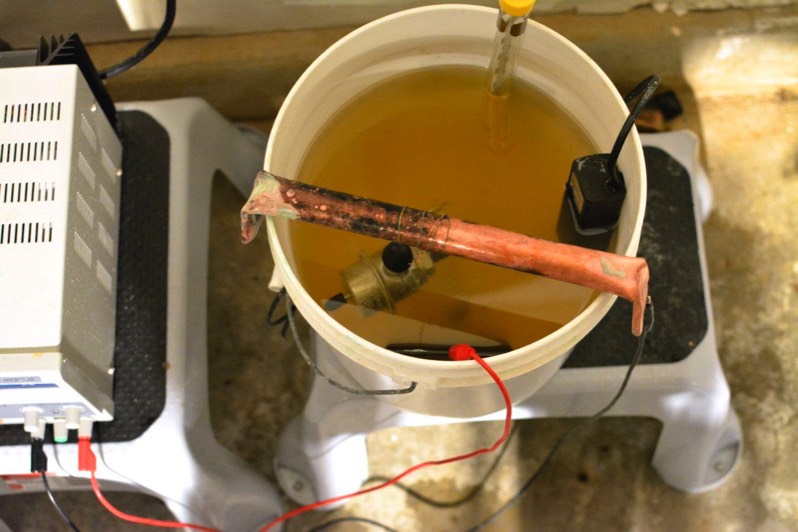
This is the Plating setup. I did not have a thermostat, so I had to constantly check the temperature of the electroplating “soup” to make sure it was around 110F.

Things get wet, obviously, so make sure that the leads coming from the rectifier are clean, and not encrusted. The negative terminal from the rectifier I clipped to the copper pipe, and became the cathode. The positive terminal from the rectifier I clipped to the sacrificial zinc plate which is left inside the electroplating solution, and is the anode.
The negative cathode (copper bar) attracts the zinc from the positive anode (zinc plate.) If you reverse this, you will be stripping the plating from your items!
Step 1: clean, clean, clean
If the parts are not clean enough to be painted, the plating won’t look good. If there is any grease on them, there will be a huge oil-slick looking blemish on your job. I used a wire wheel, steel wool, and sometimes even metal polish to strip the metal I wanted to plate.
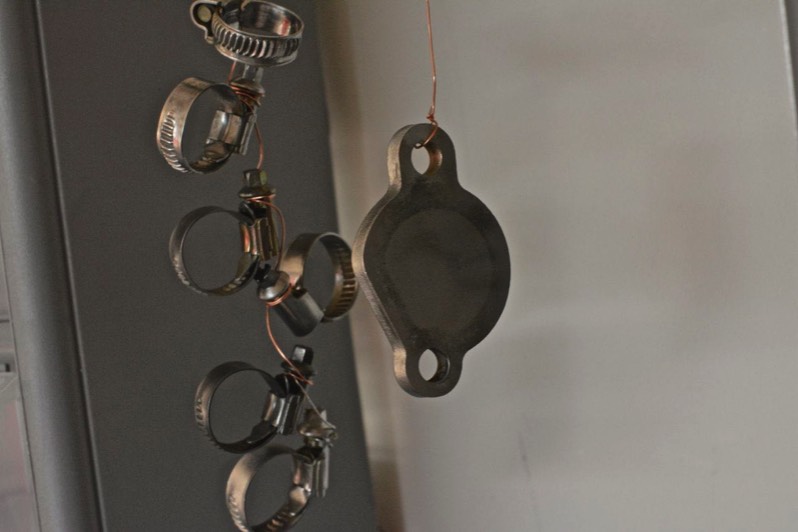
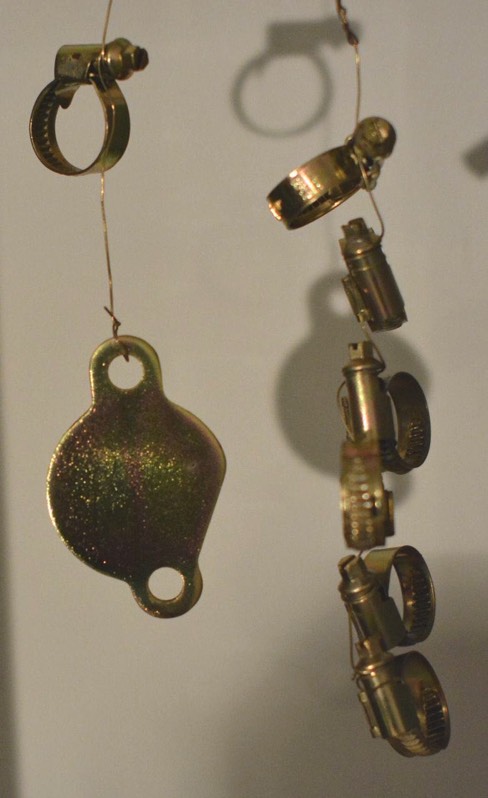
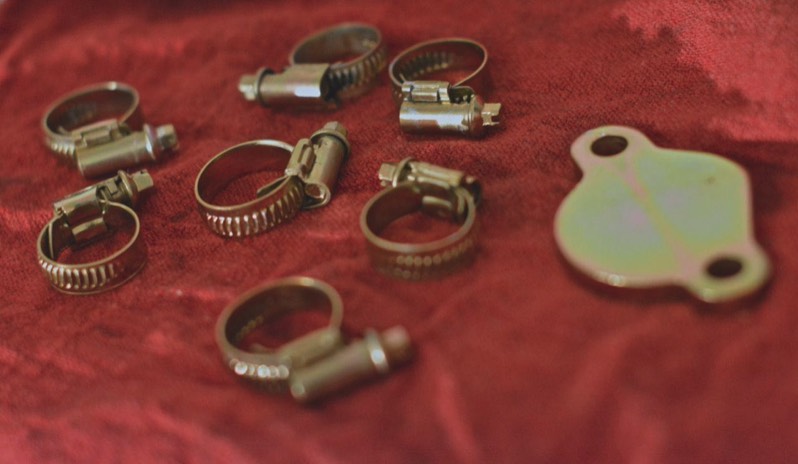
These are various clamps and a cover to the driver’s side coolant port on the ‘86.5 928S, cleaned and hanging from a copper wire. Your items must be hanging from copper wire before they can be plated.
It is ready to be dipped in hydrochloric acid. I did this for maximum 3 seconds. It removes any residual grease and leftover plating. After dipping, I swished in distilled water to remove the HCl. Very important.
Hydrogen embrittlement. Several friends have warned that hydrogen embrittlement can occur. This is when hydrogen gas is sealed into your plating object- which activates other gases and can weaken, say, a bolt. For high temperature or high-stress applications, some advise to bake the part for 1 hour at 350F before plating.
Then, wrap the copper wire (with hanging items) around the copper bar, and make sure that your items are not touching the bucket. In the picture below, I tried to hang the item as close to the anode (zinc plate with red clip) as possible, without causing a short-circuit.
Step 2: Calculate the surface area being plated
I used digital calipers, pencil, paper, and a calculator for this. A lot of fourth-grade arithmetic is in order. Calculate the surface area in square inches, then multiply by .14 amperes per square inch. Set the rectifier to its ‘constant current’ setting, and then dial in the current that you calculated. Then, turn on the aerator. The pickling solution will become bubbly.
Step 3: Plate
I found that 30 minutes was a good amount of time. 15 minutes would leave a plating so thin that it would rub off.
Step 4: Chromate
After turning off the rectifier, remove the copper bar and free the copper wire from the copper bar. The chromate solution likes to be at 80 degrees F, which is not a problem in the summer, but could be if you live in Minnesota in the winter. Experiment with the times- I found that 12 seconds of chromate was just right for the 928S.
Step 5: Let air dry
Do not disturb the surfaces after they’ve been dipped in chromate. It will wreck the surface. I let them dry at least two hours.
A very good tip from Dr. Bob on Rennlist: give your parts a light spray of clear coat, 24 hours after the chromate dip. It will preserve the plating.
Troubleshooting
The first couple of batches came out very dull. This is because I didn’t add enough Zinc Brightener. Very important.
Usually, problems occurred because I did not clean the part adequately. “Good enough” is not.
A few times the plating came out very dark. This was from too much current.
A good way to tell if you are using the right amount of current is to temporarily turn off the aerator, and look for a very fine- but constant- stream of bubbles coming from your plating object. There is a ‘just right’ stream that comes from precise calculation of plating current.
Electroplating, like everything else, requires practice. I recommend plating scrap metal to get the hang of it. Good luck!